Showing posts with label iOS 8. Show all posts

Friday, October 16, 2015

How to Edit Photos Using iOS 8's Photos App

How to Edit Photos Using iOS 8's Photos App

Listen to this blog post!
Ios8 photos app icon

Apple's packed some great photo-editing features into iOS 8's Photos app. It's not quite Photoshop but it may be all you need. Plus, it's already on your iPhone, assuming you're on iOS 8. Plus it's a ton of fun.

Here's how you can use these features to quickly improve your pictures.

Mom, and others on iOS 7: use Snapseed. Sorry about that.

Start by taking a picture, or choose one from your Photo library, and tap "Edit" at top right. If all you see is a picture, tap the picture itself and you'll see buttons appear at top and bottom. You want the one at the top right.

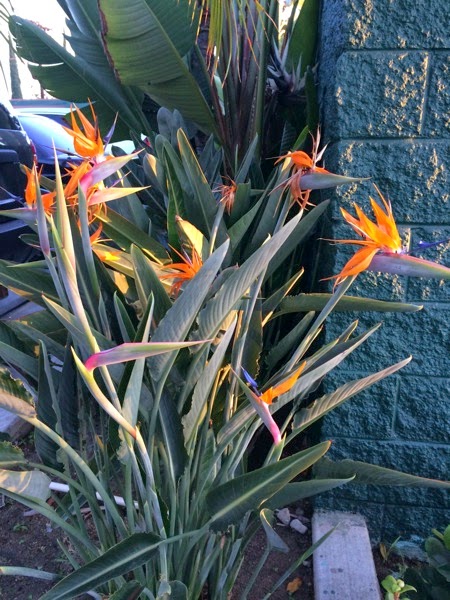
Here's a nice picture of a Bird of Paradise plant. It looked better when I took it. I'm going to fix it up.
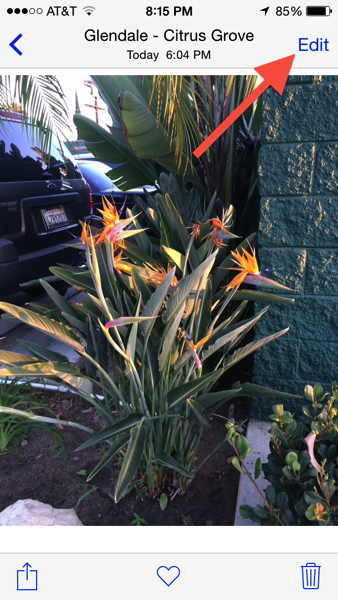
Starting to Edit

After you tap Edit you'll see something like this. Actually, exactly like this. Except your picture won't look like mine.
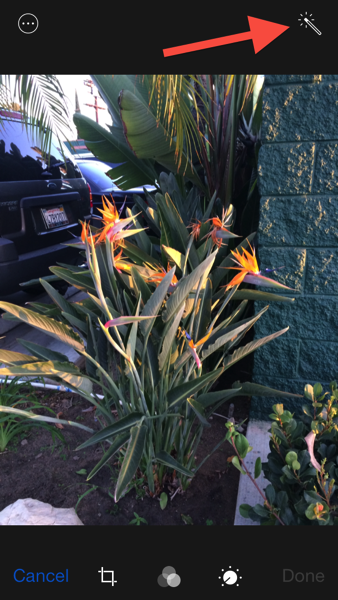
iOS 8 photos magic want tool

The first thing to try is the Magic Wand, in the top right corner. All you do is tap it and like magic your picture gets better. Tap it again to turn it off in case you don't like the results. You can see that it's fixed up my picture a little bit. I don't know all of what it does but that's why they call it magic.
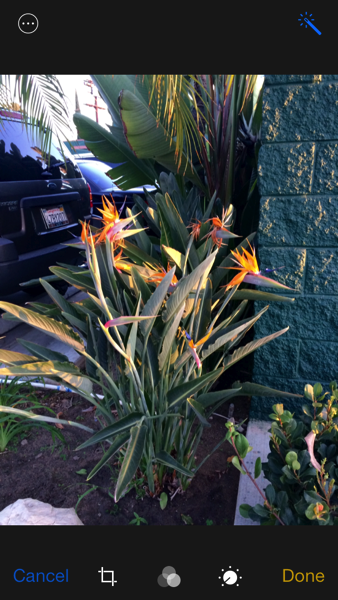
iOS 8 after using Magic Wand

I'm going to turn the Magic Wand's effect off, because while it fixed things up a little bit it didn't fix it up enough.

Let's look at the options across the bottom of the screen: Cropping, Filters, and Adjustments.

Cropping works as you might expect: tap the Crop tool and drag things around until the picture is nicely cropped.

Note you can rotate the picture as well, either freehand (by dragging with your finger) or in 90-degree steps using the square-with-curvy arrow button at bottom left in this picture.

I'm going to crop out the car in the background, at least part-way. You can also tap inside the frame and drag your picture around, as I have here. The iPhone will wait a second or two for you to stop moving things, and then it will crop and zoom in on the part of the photo you've kept.

Here's how it looked while I was working on it...
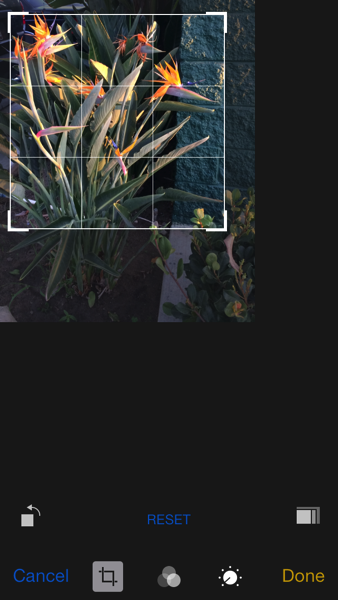
iOS 8 in crop mode

And here's how it looked a few seconds later, when the cropped section zoomed to fill the screen.
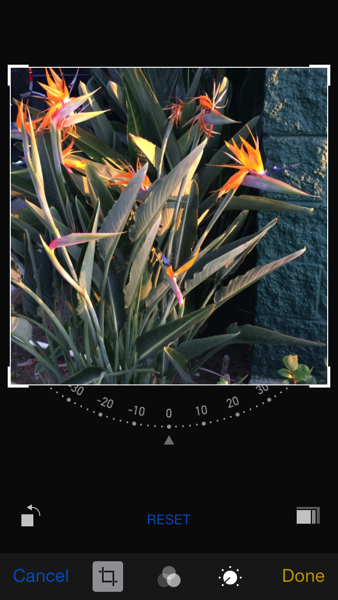
iOS 8 photos after cropping

The picture is better already.

By The Way: if you want to crop to a particular aspect ratio-- maybe a square, or 16:9-- tap the white button above the "Done" button at lower right in my picture. That will give you all of the standard aspect ratios you'd ever want. I, of course, wanted to do it "my way" so I did not use that button (although I did come pretty close to making a square).

You might be tempted to tap "Done" at this point but that would not be the right move here. If you do that you'll save the picture, which is fine, but we have more editing to do.

You might also be tempted to use the Filters (the middle button across the bottom). I wasn't. But, since all you do in the Filters section is look at a bunch of thumbnail variations and pick the one you want, you don't need my help with that.

Let's get to the good stuff. It's all under the Adjustments button. Tap it and you'll get something like this:
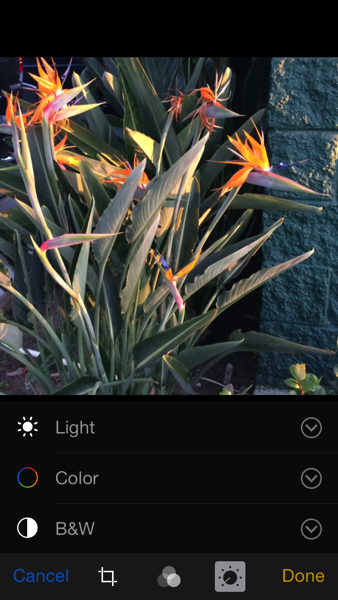
iOS 8 Photos app Adjustments

You can do a lot here-- I'm going to start in the middle, with color, because I want to punch things up by over-saturating the picture.

If you tap on "Color" (or anywhere in that row that isn't the down-arrow at the far right) you get this:
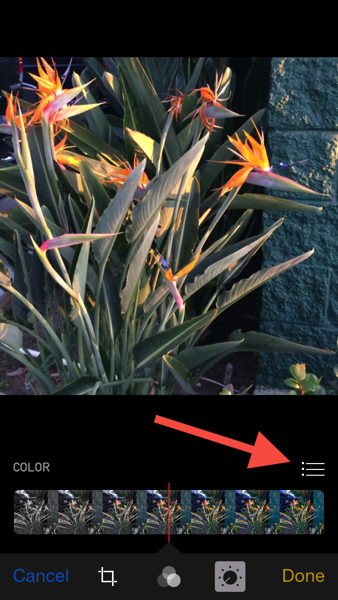
iOS 8 Photos app Color adjustments

You can drag back and forth until you get a picture that you like, and there's nothing wrong with that. But it's a little coarse and rather limited. The better way to go is to tap the down-arrow to begin with (or, if you accidentally got into the coarse-and-limited area, tap the icon I'm pointing to with the red arrow).

This is what you're looking for: options galore.
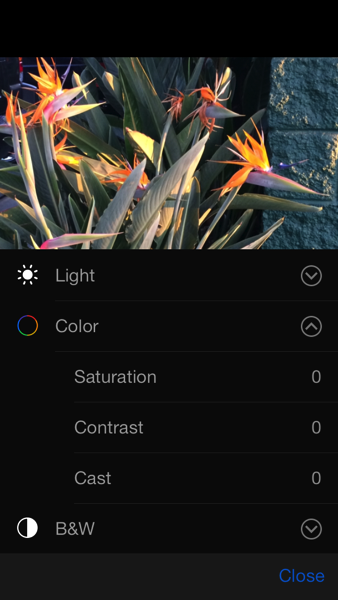
iOS 8 Photos app Color options

I want to adjust "Saturation" so I give that a tap, leading to this:
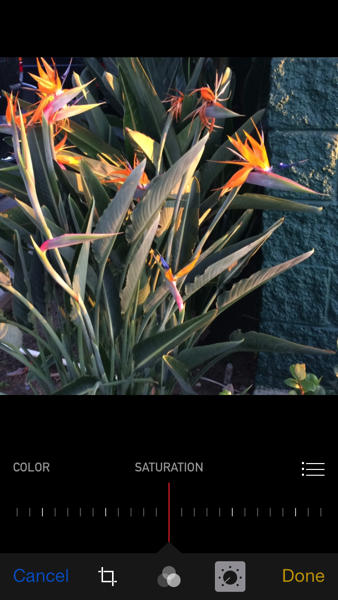
iOS 8 Photos app Saturation

This is typical of the way you make adjustments: you get a slider, and you drag it around until you're happy. It took dragging all the way to the right before I was happy and here's how it looked:
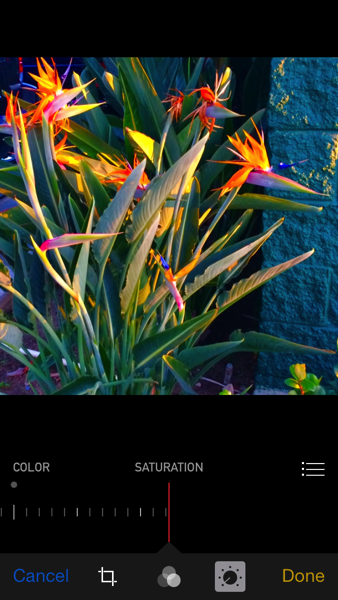
iOS 8 photos app full saturation

No wonder I was happy. What a great picture, all of a sudden. However, after mulling it over I decided to back off just a little. It's still great, just a little less loud about it.
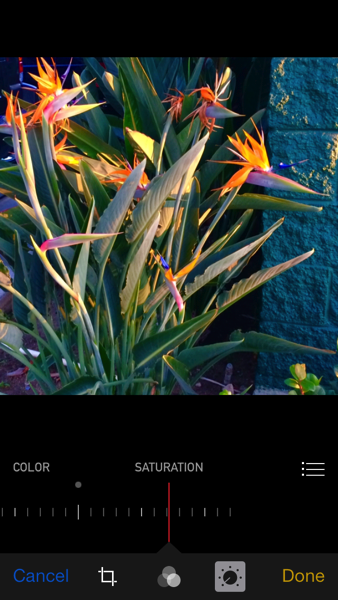
iOS 8 Photos app almost full saturation

Now we're getting somewhere. Contrast is controlled the same way that Saturation is-- with a slider. You get to Contrast by tapping the icon that looks like this:

iOS 8 Photos app options

Because it's so easy, and because this picture doesn't need any help in the Contrast department, I'm skipping it. But I will show you "Cast."

This is really "Color Cast" and it controls whether your picture is "warm" or "cool." Here's full-blast "warm:"
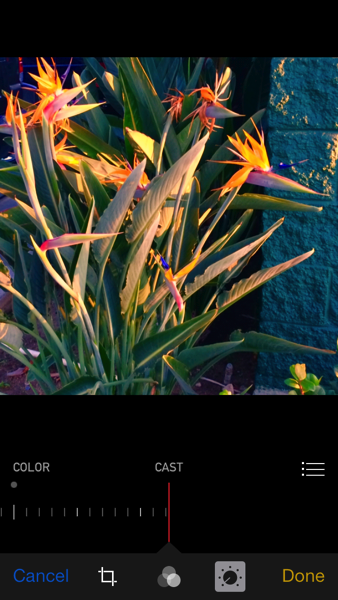
iOS photos app color cast(picture with full-blast warm color cast)

... and here's full-blast "cool."
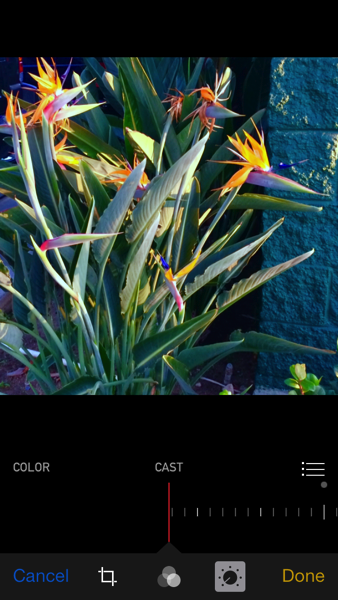
iOS 8 photos app cool color cast

I like it almost full-blast warm, as it reminds me that the sun was going down and everything had a nice warmth to it.
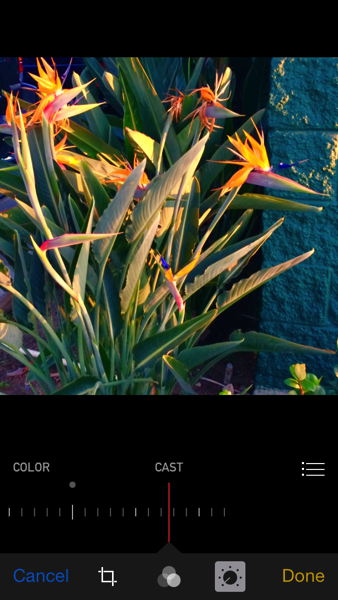
iOS 8 photos app color cast

Down below's a little movie showing you how I got to this stage. (You probably have to tap the movie to start it.)

ios8photosappmovie1

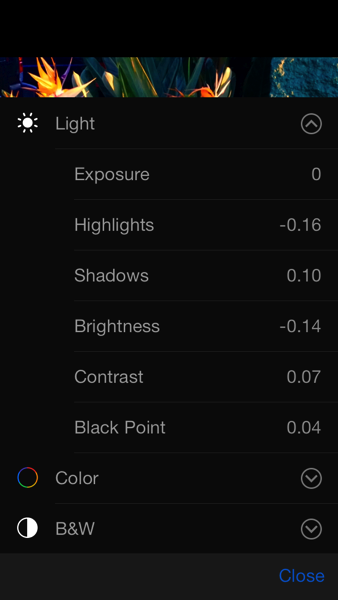
Now let's see what we can do using the controls under "Light." Remember, if you tap where it says "Light" you get the slider with the thumbnails. (Also remember: tap that button with the three dots and the three lines to get to where you can choose the Light section). If you want finer control tap the down-arrow.

Here's what the basics looks like...
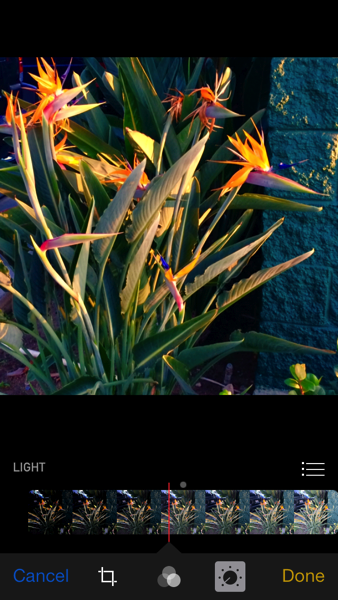
iOS 8 photos app Light

and here are the finer controls.

iOS 8 photos app Light finer controls

I'm going to darken up the shadows a little because I want the plant to really "pop."
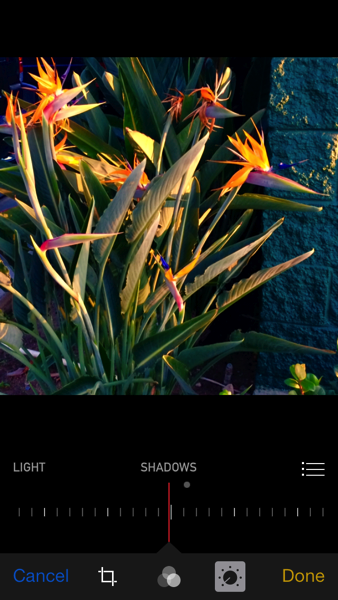
iOS 8 photos app shadows adjustment

One more thing I want to adjust is the so-called "Black Point." What you're doing with Black Point adjustments is saying "See this shade of gray? Everything that's darker than that, make it pure black." With the Photos app you don't actually get to point to the shade of gray you're talking about. Instead, you use (what else?) a slider.

Here's how it looked after a little Black Point adjusting.
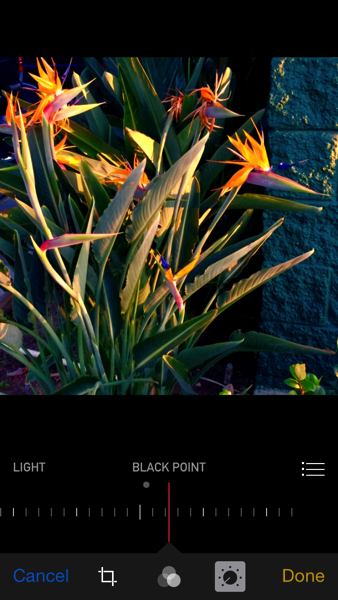
iOS 8 photos app black point adjustment

I'm going to skip the Black and White section because I'm pretty sure, after having seen how Light and Color work, that you don't need me to show you. Besides, I want a color picture, not a black and white one.

BONUS TIP THAT I DISCOVERED WHILE WRITING THIS BLOG POST:

Suppose your screen looks like this:
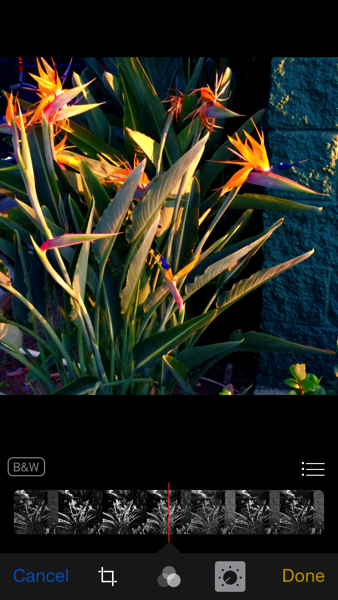
iOS 8 photos app black and white

Swipe down on the main photo-- you see the color thumbnails! Drag some more and you see the Light adjustments, and eventually the Light thumbnails. That's a nice way to switch between things, isn't it? You can drag on the thumbnails too but it is hard to drag exactly straight up and down when you get into the adjustments sections. Try it and see.

Here are the Color thumbnails...
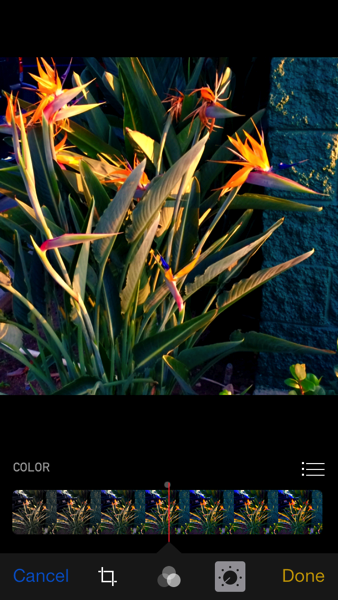
iOS 8 photos app color

and here are the Light thumbnails, both accessed by swiping up and down on the main picture.
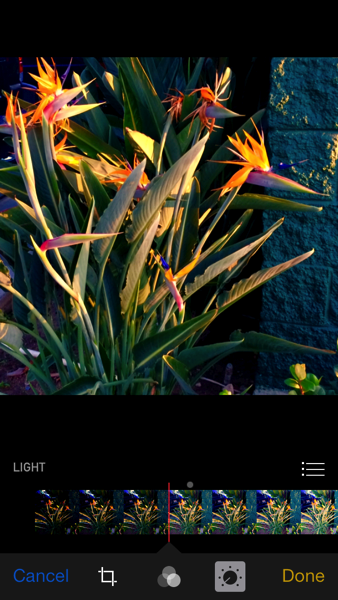
iOS 8 photos app Light

Watch the movie below and see. (You probably have to tap the movie to start it.)

ios8photosappmovie2

Now suppose you make a mistake and accidentally change your picture to black and white. Can you get out of that? (Of course you can-- this is a set-up.)
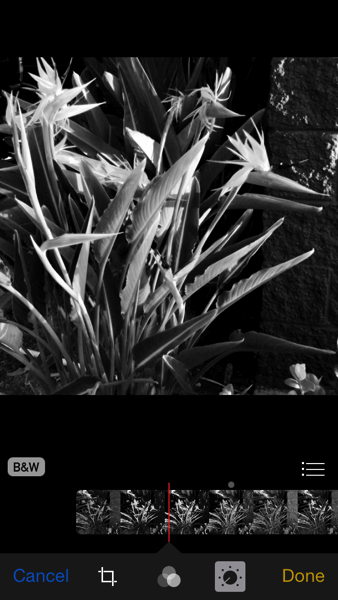
iOS 8 photos app black and white oopsy

Naturally you could tap "Cancel" but that cancels EVERYTHING. You don't want to start over. But notice the B&W is now black writing on white-- before we made our mistake, it was the other way around. Tap it, and it reverts. What a relief! See below, and notice how the "B&W" label changes. .
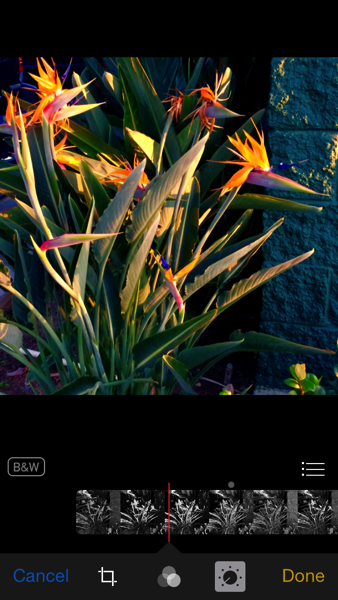
iOS 8 photos app black and white undone

Once we're satisfied with things we tap "Done" and the picture is saved. Here's our final product. Compared to the original, there's no comparison. The adjusted version is a LOT better. Maybe I should have stopped after the Saturation step, come to think of it. But it's still better.

Final Product (below)
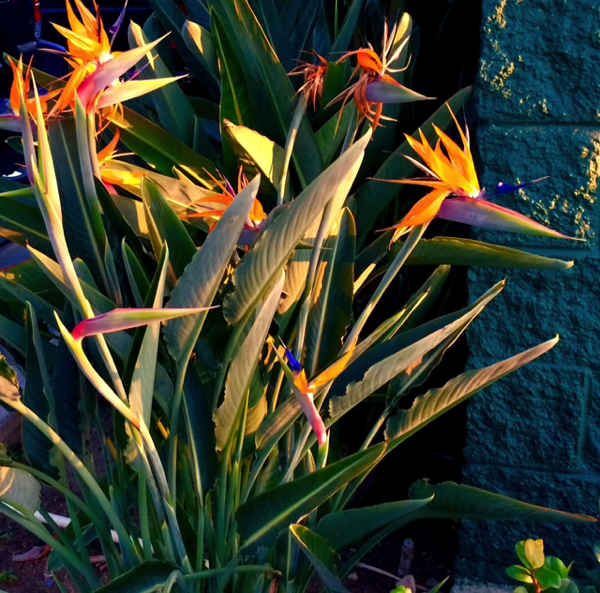
Finalproductcropped

Original Photo (below)

Original

Turns out there's more to learn but this is enough for today. If you're wondering about the button we didn't tap-- the one opposite the Magic Wand-- that's the button that allows you to access other photo-editing apps, without leaving the Photos app itself! That's pretty neat, but it's also very new, and not too many programs make themselves available to the Photos app that way. If you have some photo-editing apps on your iPhone or iPad you ought to give that button a tap.

Wednesday, September 30, 2015

iOS 8 Tip #8: Make and Answer Phone Calls From Your iPad

Eight for 8: An iOS 8 Tip a Day, 8 Days in a Row (Day Eight)

Listen to this blog post!

Eight for 8 logo day 8 eight ball

Eight for 8, Day Eight.

I make a point of turning off my iPhone's ringer when I am in someone else's office or home. Occasionally I forget to do it, and when a call comes in I rush to slide the switch to "mute." That's what happened last week, but when I muted the phone, the ringing didn't stop!

Turns out that the ringing was coming from my iPad. My iPad! The one without any cellular service (aka "the cheap one"). The one that doesn't do anything internet-y without WiFi. The one that most definitely is NOT A PHONE. All of a sudden, without any warning, my iPad thinks it's a phone.

It took me by surprise but once I figured out how it worked, I liked it.

iOS 8 Tip #8: Make and Answer Phone Calls From Your iPad

So how does it work, anyway?

Well, it works like this. If your iPhone and iPad are both on iOS 8, and they both are on the same WiFi network, and they both are signed into the same iCloud account, and they both have "iPhone Cellular Calls" turned on in the Settings, then your iPad is going to ring when someone calls your iPhone. You can answer the call on your iPad and tap the Speaker Phone button and have a little chat, all from your iPad, while your iPhone sits in the charger in another room, or maybe in your purse.

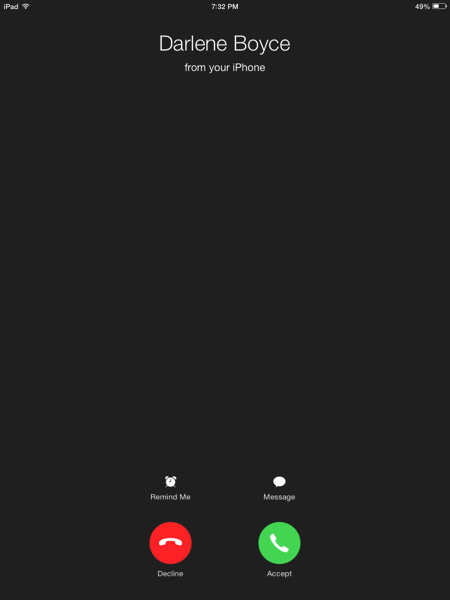
Here's what it looked like on my iPad when my mom called tonight. Repeating: on my iPad. Let that sink in for a minute.

Phone call from Mom, on the iPad

You can also initiate a call from your iPad. The calling is actually done by your iPhone, but from the point of view of the person holding and talking to the iPad, it feels like the iPad does the work. The first time you do this you'll shake your head in wonder. Now you can while away the evening playing "Words with Friends" on your iPad and when a call comes in, you just answer the call right there. I'm telling you, it's absolutely nuts.

I did some experiments here and was able to make and receive calls on my old iPhone 4s (upgraded to iOS 8), even though it no longer has service. It meets the requirements I wrote above-- iOS 8, same WiFi as the (activated) iPhone, signed into the same iCloud account as the (activated) iPhone, iPhone Cellular Calls turned on-- and by golly it's making phone calls again. I am not sure how I am going to put this to use but if I do something cool with it of course I will write it up (and if you're on the mailing list you will be among the first to know about it).

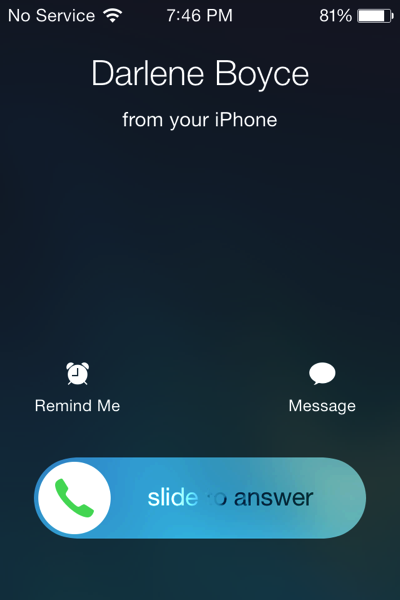
Here's a screenshot from my old iPhone 4s, the one that's been sitting around since being replaced by the 5s. It shows a call coming in.

Phone call on the inactive 4s

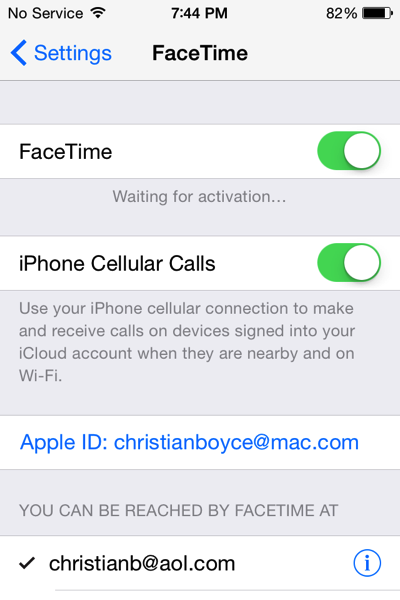
Here's what the Settings need to look like-- on your iPhone, and on your iPad-- if you want this to work. (If you turn off FaceTime the iPhone Cellular Calls option goes away.) These are FaceTime settings, so go to Settings/FaceTime on your iPhone and on your iPad and turn those things on, if they aren't on already.

<IMG 0042

When a call comes in, and you answer it on your iPad (or on your old no-service iPhone, or even on a newer iPod Touch), your "real" iPhone will show the green bar across the top, as it does whenever you're making a call. That's showing you that the phone is actually "in use." If you tap that green bar, the call will be transferred smooth as you please to your iPhone, and the iPad will simply let go. (There does not appear to be a way to pass a phone call from your iPhone to your iPad. You can answer the call on the iPad and pick it up later on the iPhone but not the other way around. FYI.)

If this all sounds vaguely familiar it's probably because Apple showed a similar feature for the Mac in June when it demonstrated the upcoming "Yosemite" Mac OS at the World Wide Developers Conference. With Yosemite, you can look up a phone number in your Mac's address book, or click a phone number in an email on your Mac, and your iPhone will make the call... but the sound comes out of the Mac, it uses your Mac's microphone, and you never touch the iPhone. That's exactly what we've got going with our iPad, assuming they're on iOS 8.

And THAT, my friends, is iOS 8 Tip #8: An iOS 8 Tip a Day, 8 Days in a Row. Please consider signing up for our mailing list, and note the links below to the rest of the tips in the series.

Links:

Tuesday, September 29, 2015

iOS 8 Tip #7: Set the Camera's Focus and Exposure Independently

Eight for 8: An iOS 8 Tip a Day, 8 Days in a Row (Day Seven)

Listen to this blog post!

Eight for 8 logo day 7

Eight for 8, Day Seven. Feeling lucky.

Some of iOS 8's new features are more like refinements of old features, and some of them are a little on the subtle side. In fact, some of them are so subtle you might not notice them-- but that's why I'm here, to point them out for you. Here's one now.

iOS 8 Tip #7: Set the Camera's Focus and Exposure Independently

Until iOS 8, the standard Apple Camera app set focus and exposure wherever you tapped on the screen. That was actually pretty powerful and many a potentially-bad photo turned out downright decently thanks to a well-placed tap. The only problem was, in some cases the thing you wanted to focus on wasn't the thing you wanted to expose for. So you compromised, but you didn't think of it like that because it was a miracle that you could set the focus and exposure at all, and besides, the pictures almost always turned out great.

However, as it is with other things, as soon as you find out how to set focus and exposure independently, as you can in iOS 8, you realize how deprived and unhappy you've been up to this point. You didn't know what you were missing (because it wasn't invented yet) but you will in a minute.

Let's have an example.

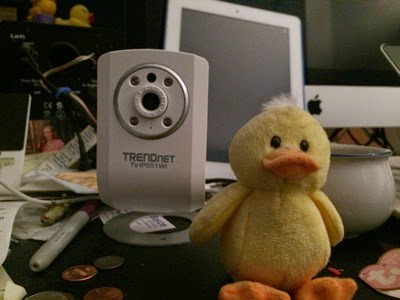
Suppose you have a bunch of junk on your desk, and a small stuffed duck, and you want to take a picture of the duck.

Original Duck picture

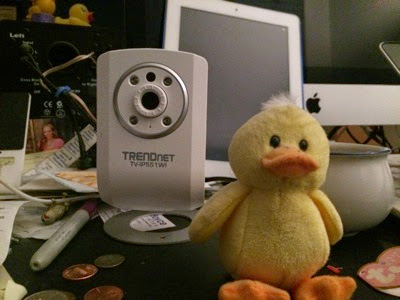
The duck isn't really in focus so I tap on it, and I get the second picture:

Duck in focus, bad exposure

That's better, focus-wise but the exposure's not right. It's just too dark. (Memo to those who might want to take pictures of a small stuffed duck: do it during the day, when the light is better. Also, clean off your desk first.)

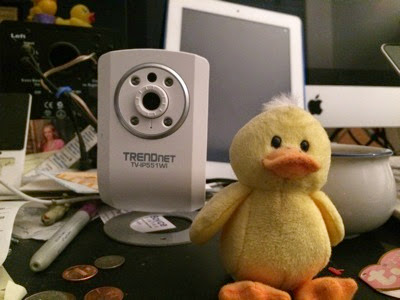
The next picture shows an in-focus duck, and the exposure is much more to my liking. That's because I took advantage of iOS 8's ability to let me set focus and exposure independently.

Duck in focus, slider gone up

Here's how it works.

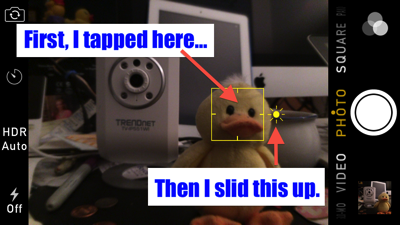
Get the camera app going and compose your picture. Tap where you want the camera to focus, same as you've done in iOS 7 and earlier. Then, notice the little sun icon to the right of where you tapped. You can drag that sun up and down to change the exposure. Do that until you're satisfied, then take the picture.

It sound simple because it IS simple. And it makes your pictures better than ever. Try it while you're thinking of it-- you'll be an expert in no time.

How I did it

(Note: I had to enhance the screenshot to make the yellow box around the duck, and also the little sun/exposure icon, easier for you to see. They won't be quite as bright in real life.)

Apple put a bunch of other features into the Camera app, including a self-timer, a time-lapse mode, and a faster burst mode. You should poke around and experiment with these features so you'll know how to use them when the need arises. Sometimes you get but one chance to take the picture; do some practicing ahead of time so you'll be ready.

And that, ladies and gentlemen, is iOS 8 Tip #7.

Links:

Monday, September 28, 2015

iOS 8 Tip #6: See the Battery Usage, per App

Eight for 8: An iOS 8 Tip a Day, 8 Days in a Row (Day Six)

Listen to this blog post!

Eight for 8 logo day 6 dice

Eight for 8, Day Six. Let's get rolling.

I get a lot of calls asking how to prolong the battery life on iPhones and iPads, so many that I've written a couple of blog posts about that already: here, and also here. But iOS 8 gives us a new tool in our quest for longer battery life, and that is the subject of today's iOS 8 tip.

iOS 8 Tip #6: See the Battery Usage, per App

If we knew which apps were eating up our batteries we'd be more careful about turning them off, or getting rid of them altogether. Now, with iOS 8, we can figure it out, because in the Settings there's a new "Battery Usage by App" option that shows you what's using up the juice. Just go to Settings, General, Usage, Battery Usage and wait for the percentages to be calculated.

Note: you could, if you wanted to, just kill every app but that is rather brute-force-ish. Using the Battery Usage screen lets us be almost surgical. it's a much better way to manage things.

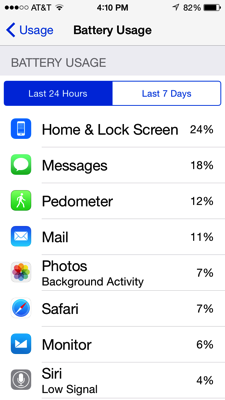
Here's a picture showing the battery usage, by app, for my iPhone 5s.

Battery Usage for iPhone 5s

There's nothing in this list that looks bad to me, as these are apps I've been actively using. It's reasonable that they're the ones that have been using up the power.

The apps that are going to steal power behind your back are the ones that do "Background App Refresh" or that use the Location Manager (such as apps that help you find coffee or gas stations or ATMs near your current location). Obviously, some apps HAVE to work in the background and some apps HAVE to use your location (and some apps have to do both: if you're using an app for navigation, the app has to keep working even if it's not the frontmost app, and it has to continually get your location so it can tell you when to turn). But a lot of apps simply want to work in the background, and in many cases the benefits are not as great as the costs. For example, I can't see a big benefit in having the Stocks app, or the Weather app, refreshing themselves in the background. I can wait a second for them to update when I launch them if it's going to save the battery.

It boils down to this: if your iPhone's battery is draining too quickly, go to Settings, General, Usage, Battery Usage and see if you can find a smoking gun. Maybe there's a forgotten app sucking down the power. Maybe you have an app doing Background App Refresh when you really don't need it. Whatever, iOS 8's Battery Usage by App screen gives you information you didn't have in previous versions of iOS. (Click here for information on turning off Background App Refresh on an app-by-app basis.)

"Knowledge is power"-- but when it comes to the iPhone, knowledge is power savings. Don't overlook this important new feature.

And that's iOS 8 Tip #6.

Links:

Sunday, September 27, 2015

iOS 8 Tip #5: Hands-Free Siri

Eight for 8: An iOS 8 Tip a Day, 8 Days in a Row (Day Five)

Listen to this blog post!

Eight for 8 logo day 5 228

Eight for 8, Day Five.

iOS 8 gives us a new, hands-free way of controlling Siri. Here's how it works.

iOS 8 Tip #5: Hands-Free Siri

Used to be, to use Siri you held the Home button down until you heard "beep beep," and then you let go and then you started talking, and when you stopped talking, Siri stopped listening. That worked pretty well except you had to keep talking-- if you paused, Siri thought you were done, and the results weren't always good.

Then Apple changed Siri so she'd listen as long as you kept the Home button down. You still had to press and hold the Home button and wait for the "beep beep" but at least your questions didn't get cut off.

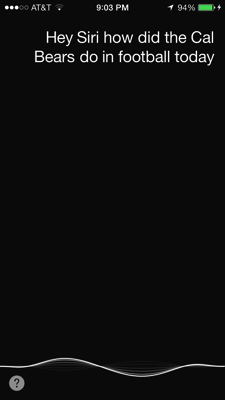
In iOS 8, Apple's given us a Siri that listens all the time. You don't have to press the Home button at all! You simply say "Hey Siri" and then whatever it is you want to say. You can wait for the "beep beep" or not. See below for an example of "not."

Asking Siri how the Bears did in football today

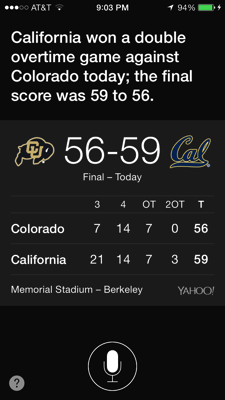
... and here's Siri's answer:

Cal won in double overtime

Sorry to say, there's a little bitty catch. The catch is, the iPhone or iPad has to be charging or "Hey Siri" won't work. That sort of limits things but it's still handy. I have my iPhone charging on the table next to my FitDesk bicycle-desk, and while I'm typing (and riding) away I can say "Hey Siri, when does UCLA play Cal in football?" and get my answer, without reaching for the phone. Pretty neat. (According to Siri the game is October 18th, 2014 but the time has not been set.)

In my experience "Hey Siri" works really well if you're within six feet of the iPhone, which means it's perfect for in the car. Just plug your iPhone into a charger and set it on the seat next to you. With that kind of a set-up you can use Siri hands-free while you drive, the way you should.

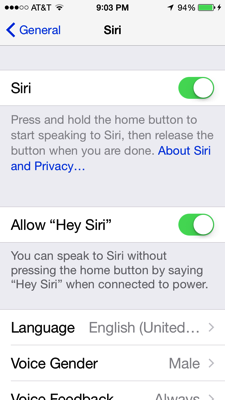
One other thing: for some reason, "Hey Siri" is turned OFF by default. You have to turn it on, but that's easy: just go to Settings/General/Siri and you'll find it.

Hey Siri switched on

That's all there is to it. Give it a whirl.

Like a lot of iOS 8 things, "Hey Siri" is something you have to remind yourself to do at first, but eventually you'll use it all the time. Just remember that it only works when the iPhone's plugged in.

And that's iOS 8 Tip #5.

Links:

Saturday, September 26, 2015

iOS 8 Tip #4: Faster Typing, Thanks to the Predictive Keyboard

Eight for 8: An iOS 8 Tip a Day, 8 Days in a Row (Day Four)

Listen to this blog post!

Eight for 8 logo 228 day 4d

Eight for 8, Day Four.

iOS 8 Tip #4: Faster Typing, Thanks to the Predictive Keyboard

iOS 8's keyboard looks a lot like its predecessors, except now it has a little strip across the top row. It uses that strip to present its three best guesses for what you want to type next. Tap a guess to squirt the word right in. It takes a little getting used to but it's worth it as it's way faster to tap on a guessed word than it is to type the word yourself. It's built into the system so it works everywhere you can type.

It's easy to overlook the Predictive Typing feature, and also easy to under-appreciate it by not understanding how sophisticated and groovy it is, so I am here to help you.

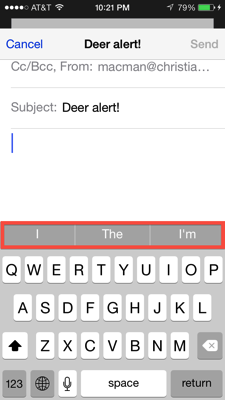
In the email message below I wanted to type "I saw two deer yesterday while driving home from Malibu." In the first picture, you see (boxed in red) iOS 8's best guesses for how I'm going to start my email.

Predictive keyboard 01

I didn't gain anything by tapping the suggested word "I" rather than typing it on the keyboard. In fact, for the first few words, the Predictive Keyboard didn't save me any typing at all. I had to type every letter of "I saw two deer" all by myself.

But then--

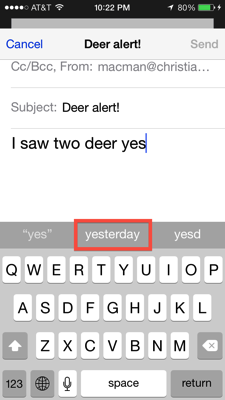
iOS 8 guessed "yesterday" after just three letters ("yes").

Predictive keyboard 02

Then it guessed "while" after "wh", "driving" after "d", "home" after "h", and "from" after "f". That's 34 characters (counting spaces between words) inserted into my message for 8 letters typed and 5 predicted words tapped. That's pretty good, and it's even better when you factor in the likelihood of me making mistakes had I typed the whole sentence myself.

Pretty neat. But it gets even better.

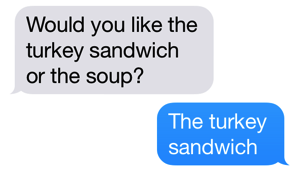
If you're using Messages, and someone sends you a question with choices, the Predictive Keyboard will present those choices as its best guesses. Look at this screenshot, where a HIGHLY VALUED customer is asking me what I'd like for lunch.

Turkeysandwich or soup

I should have taken a screenshot but take my word for it, I didn't have to type "The turkey sandwich." iOS 8 predicted it. "The turkey sandwich," "The soup," and "I don't know" were presented as choices across the top of the keyboard. (Note to iOS 8 Keyboard Design team: "Both" would be more useful than "I don't know".) All I had to do was tap "The turkey sandwich" and like magic, not only did the words appear but shortly so did the sandwich.

It takes a little training to remember to look at that strip of words across the top of the keyboard but it is worth it, so start using it now and you'll be great at it in no time.

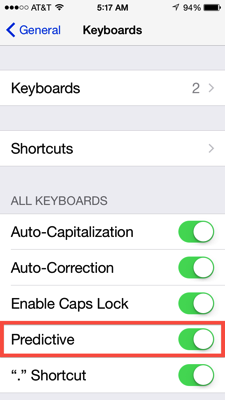
If the Predictive Keyboard doesn't appear for you, maybe you've turned it off. Look in the Settings, and then General, and then Keyboard, and turn it back on.

Predictive keyboard 04

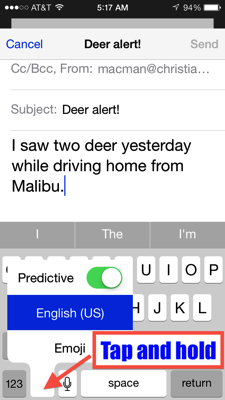
It's also possible to turn the Predictive Keyboard off (and on) from the keyboard itself. Just tap and hold on the "Emoji" icon (a happy face) or the keyboard switcher icon (looks like a globe) and you'll see how to switch Predictive on and off.

Predictive keyboard 05

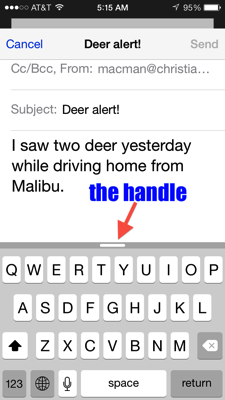
As you can see, you're not likely to accidentally turn the Predictive Keyboard off. There is a decent chance that you will accidentally hide it. Swiping down on the little Predictive strip will hide it, leaving a small handle. Swipe up on the handle to bring it back. See below.

Predictive keyboard 06

The iPhone and iPad save you a lot of typing, even without the Predictive Keyboard. There's auto-correction, dictation, and text-expansion shortcuts that you can define yourself. The Predictive Keyboard takes things up a notch, and it's well worth a try. It works for me and I'll bet it will work for you.

Links: